Friday, 4 April 2025

Nakajima Kikka in 1/72 scale by Danilo Renzulli


Another divine scale gem from the workbench of Danilo Renzulli. The Kikka (Divine Orange Blossom), Nakajima's lookalike (but smaller) Me 262, officially the Experimental Special Attack Aircraft 'Kikka' (試作物殊攻撃機 '橘花’). This pioneer Japanese turbo-jet was realised from the Naval Air Headquarters Koukoku Heiki (皇国兵器 - 'Empire Weapon' is one translation) No.2 specification of late August 1944 calling for a land based attacker suitable for attacking enemy warships and vessels off the coast of Japan with the capability to carry a single 800 kg (1,760 lb) bomb, although the envisaged normal bomb load was 500 kg. The wings folded just outboard of the engine nacelles to assist concealment on the ground. The aircraft was to be used for suicide attacks and there appears to have been no provision for air to air gunnery armament in the initial design. The designation J9Y1 sometimes attributed to an interceptor version of Kikka was never officially used. With the replacement of the original Hitachi Hatsukaze ('Fresh Wind') and Ne-12 turbo jets by the more promising Ne-20 powerplants it was planned to create two-seat trainer, two-seat reconnaissance and interceptor versions, the latter armed with two 30mm cannon for air defence use against the B-29.

Planning for construction at the Nakajima (at dispersed plants from April 1945), Kyushu Hikoki, Sasebo and 1st Aircraft Arsenals called for 57 aircraft by August 1945 rising to 80 in September 1945. By the end of the war 22 aircraft were still under construction at Nakajima and two more were under construction at the Kyushu Hokoki plant. A single example No.1 was completed by 31 June 1945 and test flown on 7 August 1945. Aircraft Nos.2, 3, 4 and 5 were nearly completed by war's end but lacked landing gear and other fittings. Two fuselages Nos. 6 and 7 were sent to 1st Naval Technical Arsenal in July 1945 for conversion to two-seat trainers. Nos.8 to 10 had completed fuselages, 11 to 16 completed fuselages awaiting assembly with completed wings and 17 to 25 completed fuselages with wings under construction. With that brief background introduction to Kikka, over to Danilo then:-

1/72 MPM Nakajima Kikka

'Bought at the beginning of the 2000s, this kit has been lying for years in my stash with very little work on it over time. Only in February 2024 I decided to finish it, its building process looking not so complicated. The model actually revealed a smooth construction - most probably thanks to the clean lines of the original aircraft - and little putty was needed as can be seen from the images. The photo etch sets included in the kit and from NH Detail (A72-050) supplied several parts to complete the canopy and other external details.

'As is often the case once the two fuselage halves had been joined and the canopy fixed in place, little could be seen of the cockpit interior. I found the canopy surprisingly thin and well moulded despite this being one of the early MPM kits - it was just sanded down and then polished with automotive polish cream. The forward undercarriage wheel well was fabricated with plasticard and the undercarriage leg attachment modified. 

'As usual I added a few external details using some brass tube such as the pitot tube, the small device provided under the fuselage tail to prevent damage during take-off, the small exhaust pipes in the engine nacelle sides and the undercarriage retraction arms. The wheel well  covers and the undercarriage leg compasses were again from the NH Detail sheet.

'On this model I attempted a new method to highlight fuselage and engine nacelle panels. I masked some panels with tape and sprayed over one or two layers of primer to build up some thickness, then the entire model was primed. To obtain a deeper separation line between the nacelle panels I fixed a piece of fishing line around the nacelle and then sprayed the primer over that as shown in the pictures.

'The two small circular covers on top of the fuselage located before and after the canopy have been obtained with a punch from thin can sheet. Some work was needed to improve the shape and thickness of the jet air intakes and exhausts, and I had to re-shape the rear of the engine nacelle to wing fitting - that being the most critical area of the entire build. A fine venturi tube from SBS was added to the fuselage right side.

'Note that I didn’t install the RATO equipment due to the fact that I could not devise a satisfactory solution to scratch-build the rockets.


'The green/grey livery was a personal mix of paints from Gunze Mr. Color, while the Hinomaru were sprayed on using Maketar masks. Then a light weathering process by dry-brushing was applied to some surfaces plus a layer of matt finish by brush. In the end I can say that I loved the final result and the lines of this tiny early jet era plane. It’s a shame we couldn’t see this aircraft in an operational scheme - just to add some kokutai code…'


With very special thanks to Danilo for sharing these images and build notes.

Two editions of the Kikka kit were released by MPM, the first in 1998 and the second, an 'Updated' kit, in 2002 (MPM became Special Hobby in 2016). Other injection moulded Kikka kits in 1/72 scale have been released by Merlin Models (good luck with that one!), Pegasus (who asserted red brown upper surfaces) and in several different speculative versions by AZ Model, including the historic original, an Otsu air defence fighter, a two-seat trainer and two night fighters, one with oblique armament, but all are sold out at their website and seemingly as rare as hen's teeth elsewhere. There have also been various vacform and resin kits, as well as a popular 1/48 scale injection moulded kit released since 1995 in several editions by Fine Molds.

According to Bill Devins (in Small Air Forces Observer, Vo.25 No.4 December 2001) MPM was first formed by a group of Czech modellers in 1988 and was formalised as MPM Ltd in November 1989. It then expanded to market plastic injection moulded kits under the labels MPM, MPM Short Run, Cooperativa, Condor, Special Hobby and Azur. 

References: The introduction to Danilo's model was drawn from 'Kikka' by Robert C Mikesh (Monogram Close-Up 19, Monogram Aviation Publications, 1979) and 'General View of Japanese Military Aircraft in the Pacific War' by the Staff of AiReview, (Kantôsha Co.. Ltd. Japan 1956). The latter reference, despite being 'old', is recommended in view of the impressively long list of Japanese aeronautical veterans consulted by the editorial staff. It has a useful English language supplement and is readily available from AbeBooks in a range of editions and prices. The Monogram Close-Up books, focussing mainly on Luftwaffe types, were exceptionally good references, packing a lot of useful data into 32 pages for Kikka.

Image credit: All photos © 2025 Danilo Renzulli 

Wednesday, 2 April 2025

Igor Kochan's RoCAF Pursuit Duo in 1/48 Scale


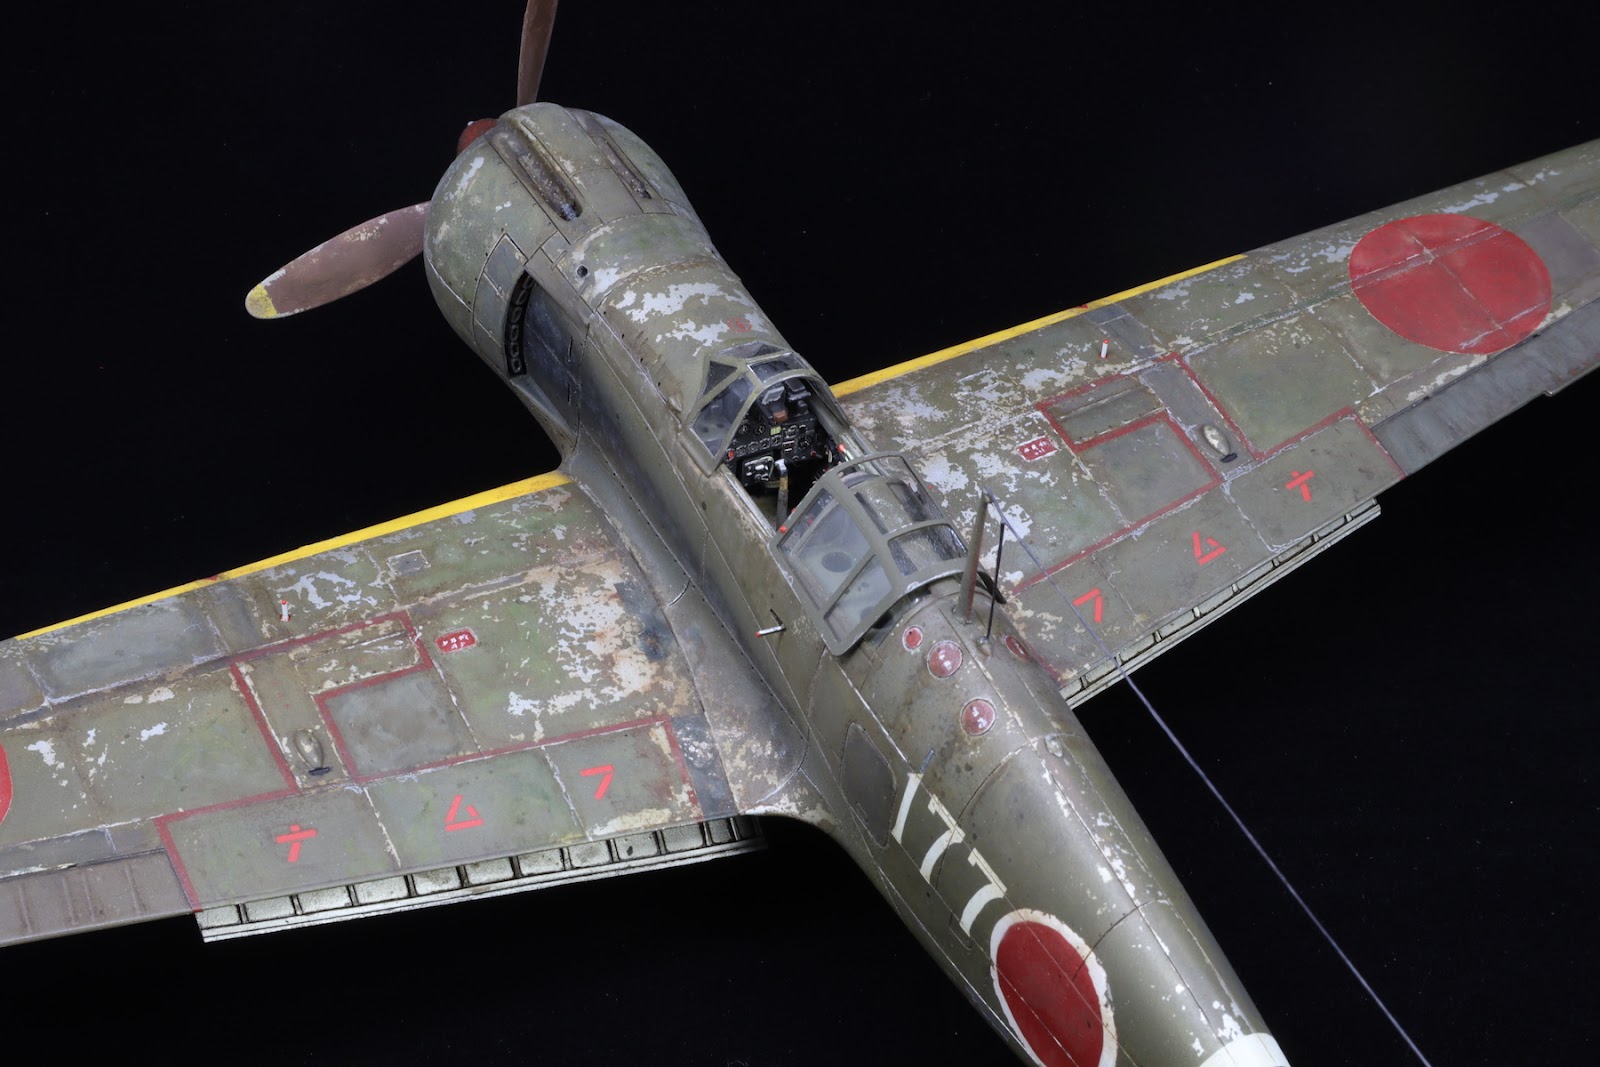
I am delighted to be able to present this pair of superb 1/48 scale models of two Republic of China Air Force ex-USAAF fighters crafted by Igor Kochan, a Slovak living in Prague, Czech Republic, and thanks to the kind facilitation of correspondent Marian Holly. The photos were taken by outstanding Czech modeler Miloslav Hraban. I really like the dropped flaps on both these models but especially on the P-47, whilst the RoCAF insignia and striped rudders present attractive alternative schemes. Igor describes the builds in his own words.


'If you ask, why RoCAF? I have to go back to 1988. While visiting a friend, I saw a 1/72 scale model of the Dewoitine D-510 in his collection sporting white sun in a blue circle on its wings. What is that? Until then, I had never seen anything like it, nor did I know that aircraft with this insignia even existed. At that time, behind the Iron Curtain, information was very scarce. However, this visit inspired me, and I became interested in Chiang Kai-shek's air force. There was no turning back, and my focus has since been on the Kuomintang era to the present.


P-51D Mustang

'I used the 1/48 Eduard model which is highly detailed and accurately shaped. The replica represents an aircraft handed over to the RoCAF by a USAAF unit after the end of combat operations in the Chinese theater.


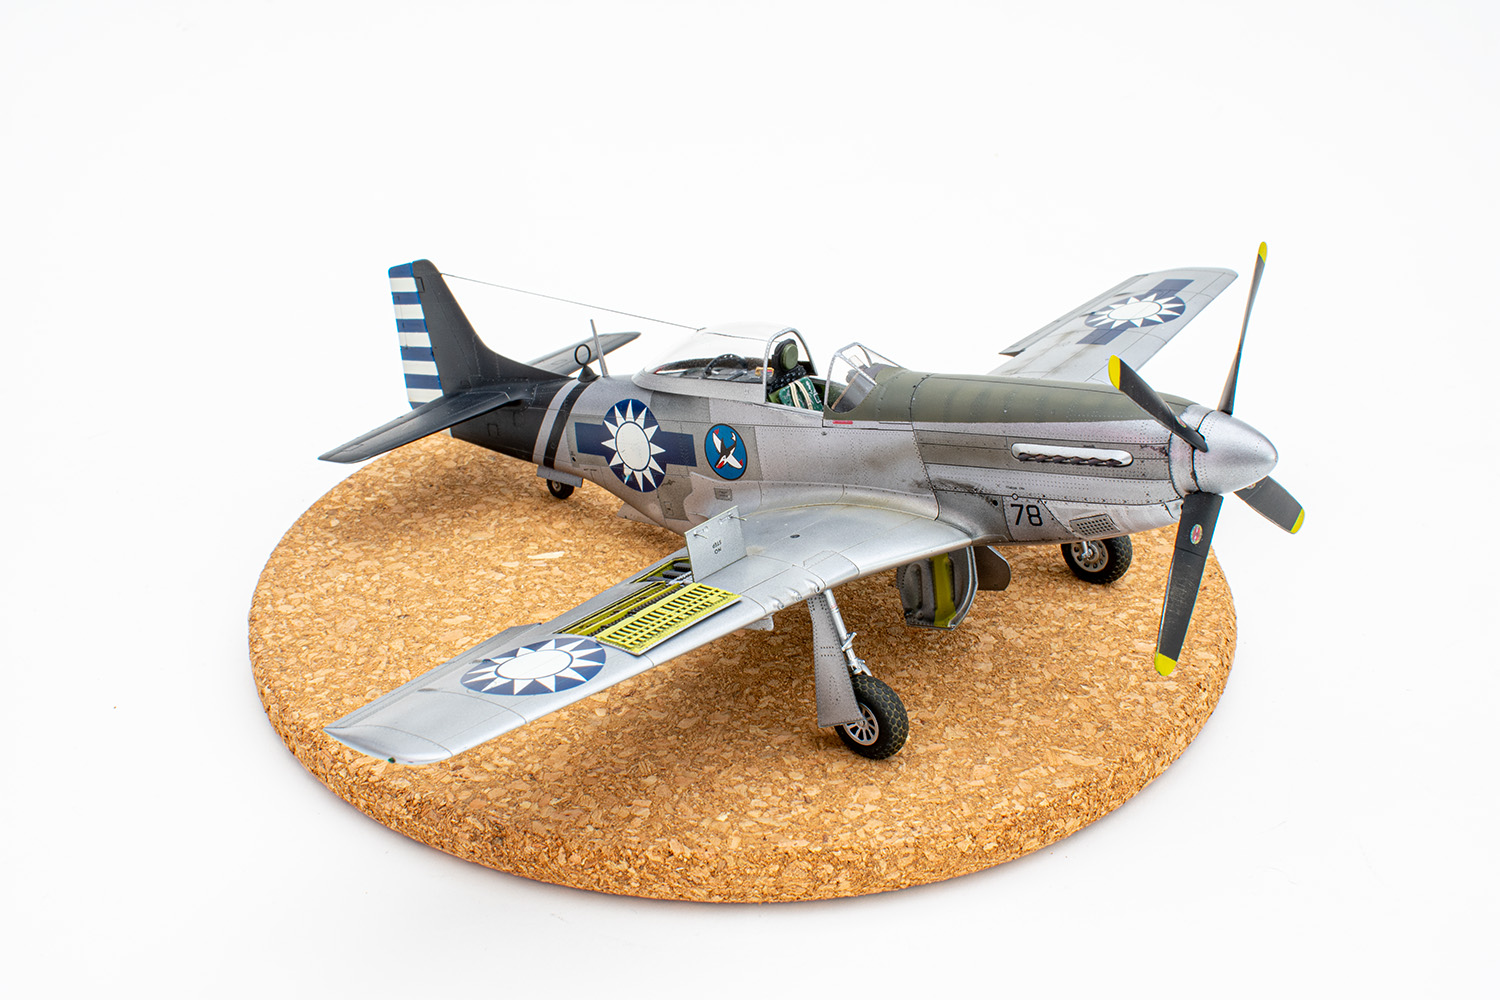
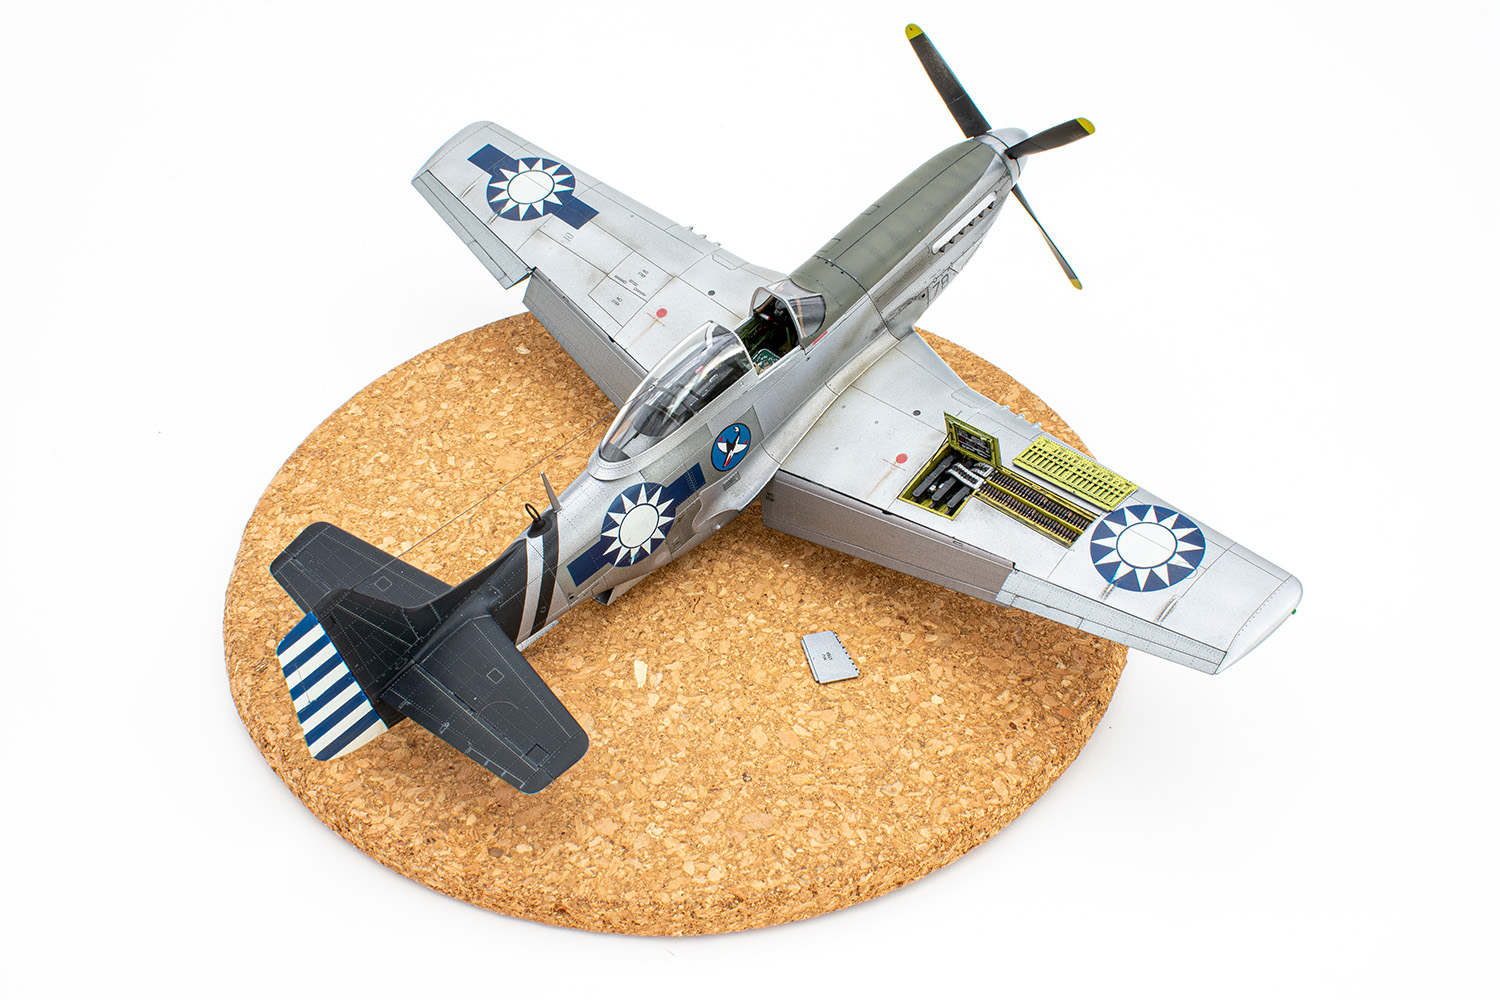
'I upgraded the model with a photo-etched instrument panel, seat belts, resin wheels, and open gun bays - all from Eduard. The markings were airbrushed using Omask stencils, while the unit emblem and engine cowling numbers come from a DK Decals sheet. The model is painted entirely with Mr. Paint brand lacquers. The weathering was done using Umton oil paints.
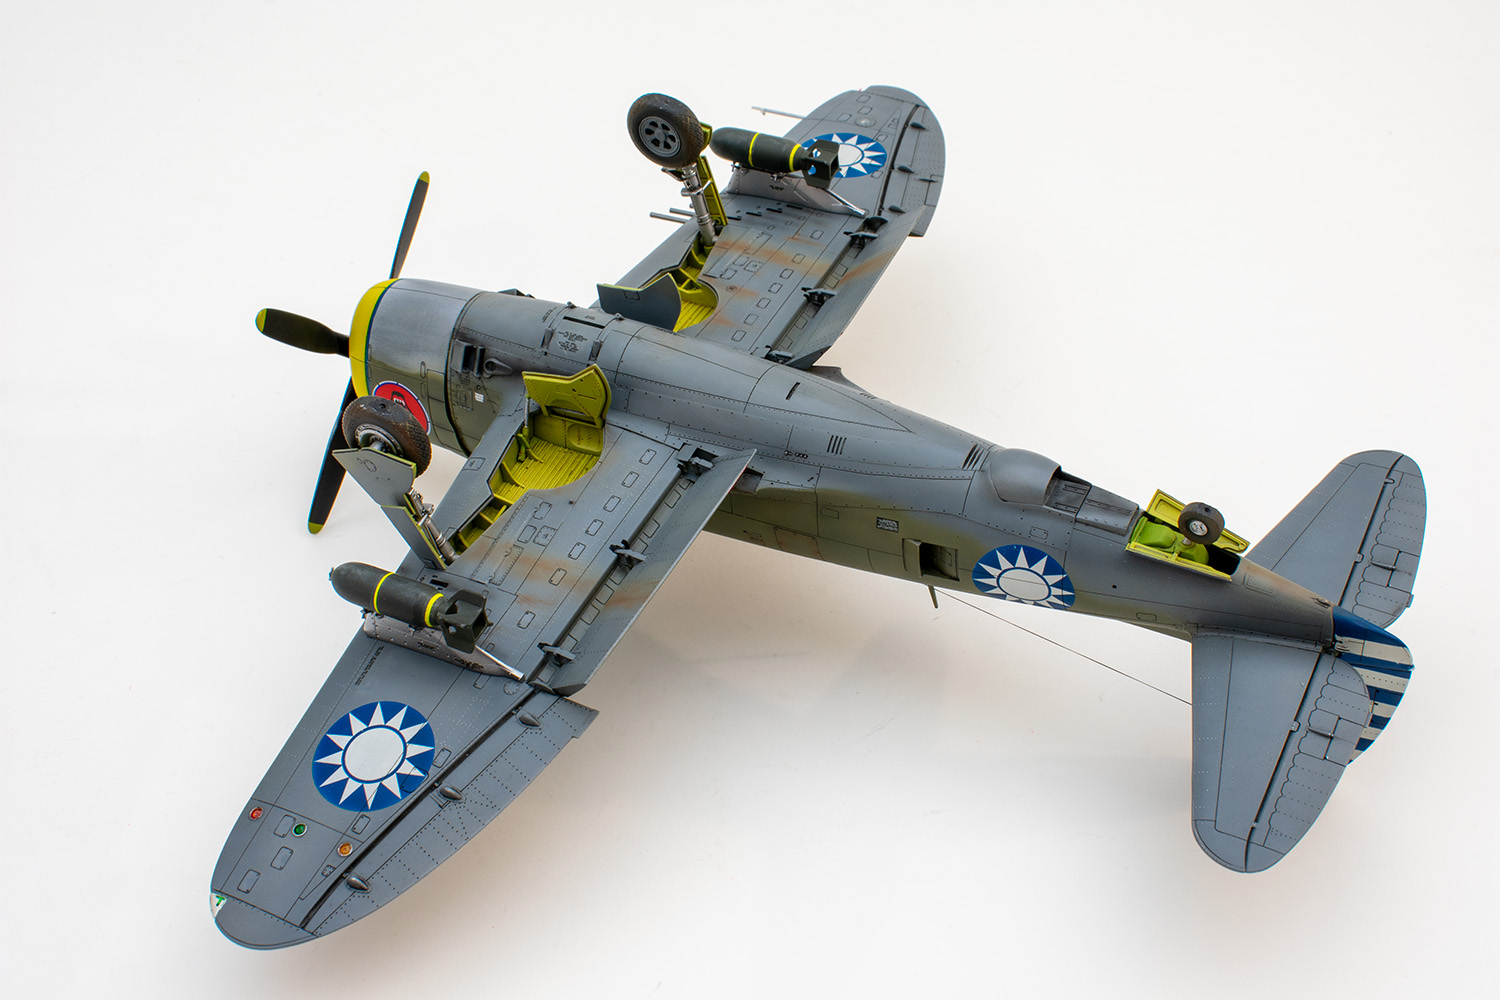

P-47D Thunderbolt

'This model represents the Republic P-47D-30, 43rd Fighter Group, RoCAF, from 1947, which I modified from 1/48 Tamiya’s P-47D-28 Bubbletop kit. The main difference lies in the added dorsal fin extension and the repositioning of the landing light from the landing gear well towards the wingtip. I used parts from Tamiya’s P-47M kit for these modifications. The model is enhanced with an Eduard LOOK set for the cockpit, a canopy mask, landing gear wheels, and decals—all from Eduard. The surface details include positive rivets from HGW, plus a few personal modifications.


'The markings and serial numbers were airbrushed using Omask stencils, while the unit insignia on the engine cowling comes from a Bestfong decal sheet. I used Mr. Paint for the camouflage and the weathering was accomplished with Umton oils and AK pastels.'


With special thanks to Igor for sharing these images of his beautiful work and to Mario for facilitating their feature here. I hope Igor will share more such RoCAF gems in due course. The Kuomintang (KMT) is the National Peoples Party of China (中國國民黨) currently represented in the multi-party, democratic government of Taiwan

Image credit: All photos © 2025 Igor Kochan via Marian Holly.

Tuesday, 1 April 2025

Blog Makeover


After 17 years presenting this blog a change is necessary. The paucity of comments and the occasional weaponised comment (those pointedly ignoring the work done by the blog author, not least in wrestling with Google's 'improved' interface) have lately been discouraging. Most blog entries take several hours to format and present, the preparation for sharing of colour data often longer. So I'm turning from Japanese aviation to a secondary but equally passionate  interest in the history of cavalry and the British cavalry in particular. 


The blog will be re-named 'Dragoon Guards Blogminster Journal' covering historical cavalry subjects - and especially the horses - from Roman times to WW2. I hope that it will attract an increased and more encouraging readership. 

'Hurrah, hurrah, hurrah!'

Image credit:- Heading image James Thomas Brudenell, 7th Earl of Cardigan, by Sir Francis Grant; Middle image Trooper W E Leedham, 6th Iniskilling Dragoons, my great grandfather; Lower image the Scots Guards cheering Queen Victoria at Buckingham Palace before their departure to the Crimea, 1854

Post article note: Updated for the benefit of 'espositor'.

Sunday, 30 March 2025

Aichi E16A1 Zuiun in 1/72 by Danilo Renzulli

It is a delight to present these images and notes of a painstaking build of the Fujimi Aichi E16A1 Zuiun kit in 1/72 scale by Danilo Renzulli, achieving a brilliant result. This was a partial reconstruction of the Fujimi kit released in 1998 that Danilo had purchased shortly afterwards. He began building the model in the early 2000s but halted the process mainly because there was a significant issue with the wings to fuselage joint and also due to lack of suitable reference documentation. However the basic assembly was there and so it remained for a long time . . . Danilo writes:- 

'Last summer I decided, along with other unfinished models, to give it a go - the model was almost completely dismantled and the interior fixed by squeezing in the resin cockpit assembly from the Special Hobby kit which I had recently purchased online. Plundering the SH kit was nearly a shame but that kit had some dimension problems in the cowling and front fuselage area so I decided to sacrifice it to have a decent representation in my Fujimi model. In the cockpit stub the machine gun housing was built from scratch with some plasticard, some other parts recovered from the spare parts stock, the instrument panel also from the SH kit's photo-etch sheet and the seatbelts from Eduard. Some adjustments were necessary to properly fix the resin stub into the fuselage halves - this done, the worst was behind me.

'Apart from the wings to fuselage gap, in general this is a nice kit that builds well into a model that captures the modern lines of this aircraft. The transparencies are very good with the interesting choice of open or closed canopy. The panel lines are a little overdone but  I left them as they were. 

'As for my latest models some details have been realized with the help of some telescopic brass tubes such as pitot tube, the float strut steps, a small ring under the rear fuselage, the aileron underwing hinges and each exhaust stack cut to the proper length and slightly pressed at the end to resemble the original. Some riveting was also added. Bomb racks again from the spare parts stock.

'The decals are from the Fujimi kit and camouflage was from a mix of Mr. Color paints. The navigation lights on the wing tips were cut (and sanded down) from toothbrush transparent handles. The weathering is the result of dry brushing and the use of a silver pencil along with some very soft sanding with water and extremely fine and well used sanding paper. My only concern is about the upper surface green which, in my opinion, should be a bit darker - Nick your opinion is welcome, of course!

'The finished model is presented sitting on its fine dolly as included in the kit but since I omitted to place sufficient weight in the floats I had to create a sort of diorama using the trestles provided in the Aoshima Ki-61/Ki-100 series kits. Then the model and trestles were fixed onto a piece of 3mm plywood with vinyl cement. I hope you enjoy it . . . '

Well I did, Danilo, including the green finish! And the kit's decals look good, well done Fujimi. With special thanks for sharing the images and notes of a very fine piece of work. And thank you for your patience awaiting their presentation here!

Image credit: All photos © 2025 Danilo Renzulli